Get started with Rhetis
Learn the basic flow from creating an account and entering your first prompt to reviewing the story, completing a skeleton, and producing a final deck.
This guide explains the shortest path for a first-time Rhetis user to create a project and reach an editable deck. You do not need to learn every feature first. Prepare the purpose of your presentation and reference materials, then review the flow Rhetis proposes one step at a time.
What to prepare before you begin
Minimum preparation
- Presentation goal: In one sentence, define whether the deck is for reporting, persuasion, a proposal, or education.
- Audience: Identify the people who will use this material to make a decision or take action.
- Core material: Prepare the documents, existing PowerPoint files, notes, or figures that must be reflected.
- Scope: Decide roughly how many slides you want or how long the presentation should be.
You can begin without reference materials. However, if actual figures and evidence matter to the deck, preparing the relevant files first will make the result more accurate.
Create your first deck
- 1
Sign in and prepare a workspace
Sign in at
/signinwith an email address or Google account. On your first sign-in, choose a personal or team workspace, then set the type of first deliverable and the workspace name. You can upload reference and brand materials at this stage or add them later. - 2
Enter a request from Home
In the Home composer at
/app, enter the presentation goal, audience, deliverable type, and desired scope. You can drag files into the input area or attach them with the add-file button.Here is an example of a strong first request.
Using the uploaded second-quarter performance report and launch schedule, create a business update deck of about 10 slides that helps leadership decide next-quarter investment priorities. Keep the sources for key figures, and place the conclusion near the beginning.
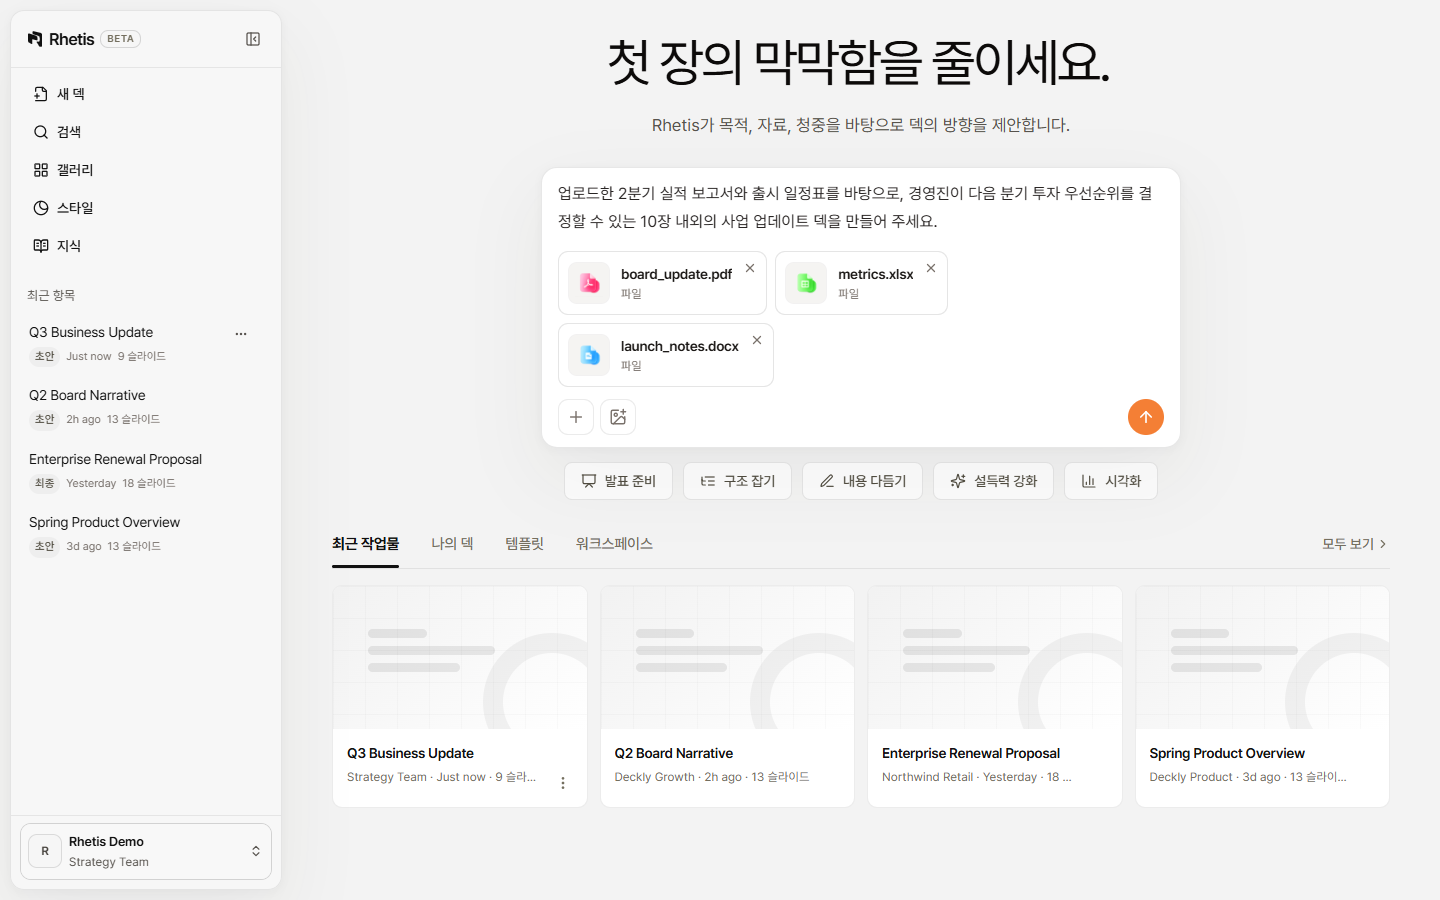
Add the goal and audience to the prompt, attach reference files, then choose a suggested task or send it directly. - 3
Answer intake questions
Rhetis asks about the audience, required decision, scope, presentation style, or missing context. For multiple-choice questions, choose the closest answer; in free-text fields, add exceptions or anything that must be included.
- 4
Review the story plan and storyline
Review the central logic, recommended structure, and areas with insufficient evidence proposed by Rhetis. Then check whether the title and message of each slide connect naturally. Before design, first verify why the presentation should be told in this order.
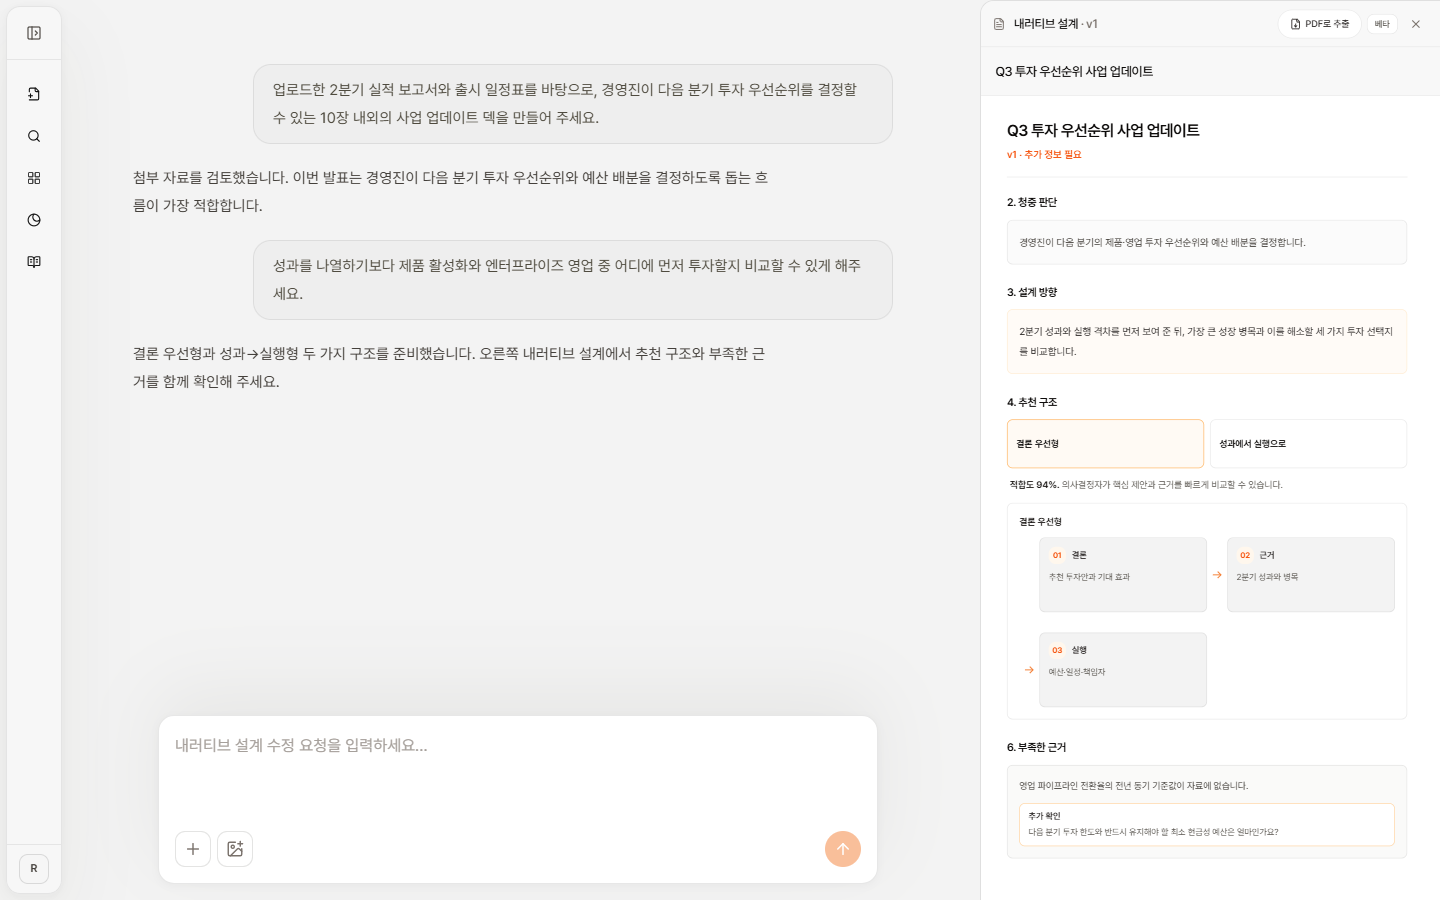
Compare and select a recommended structure while reviewing the narrative flow, evidence gaps, and follow-up questions. - 5
Generate and revise the skeleton
After you approve the storyline, Rhetis creates a skeleton with text, data, and image areas for each slide. Adjust slide order, text length, block content, and layout directly, or ask Ask Rhetis to make targeted revisions.
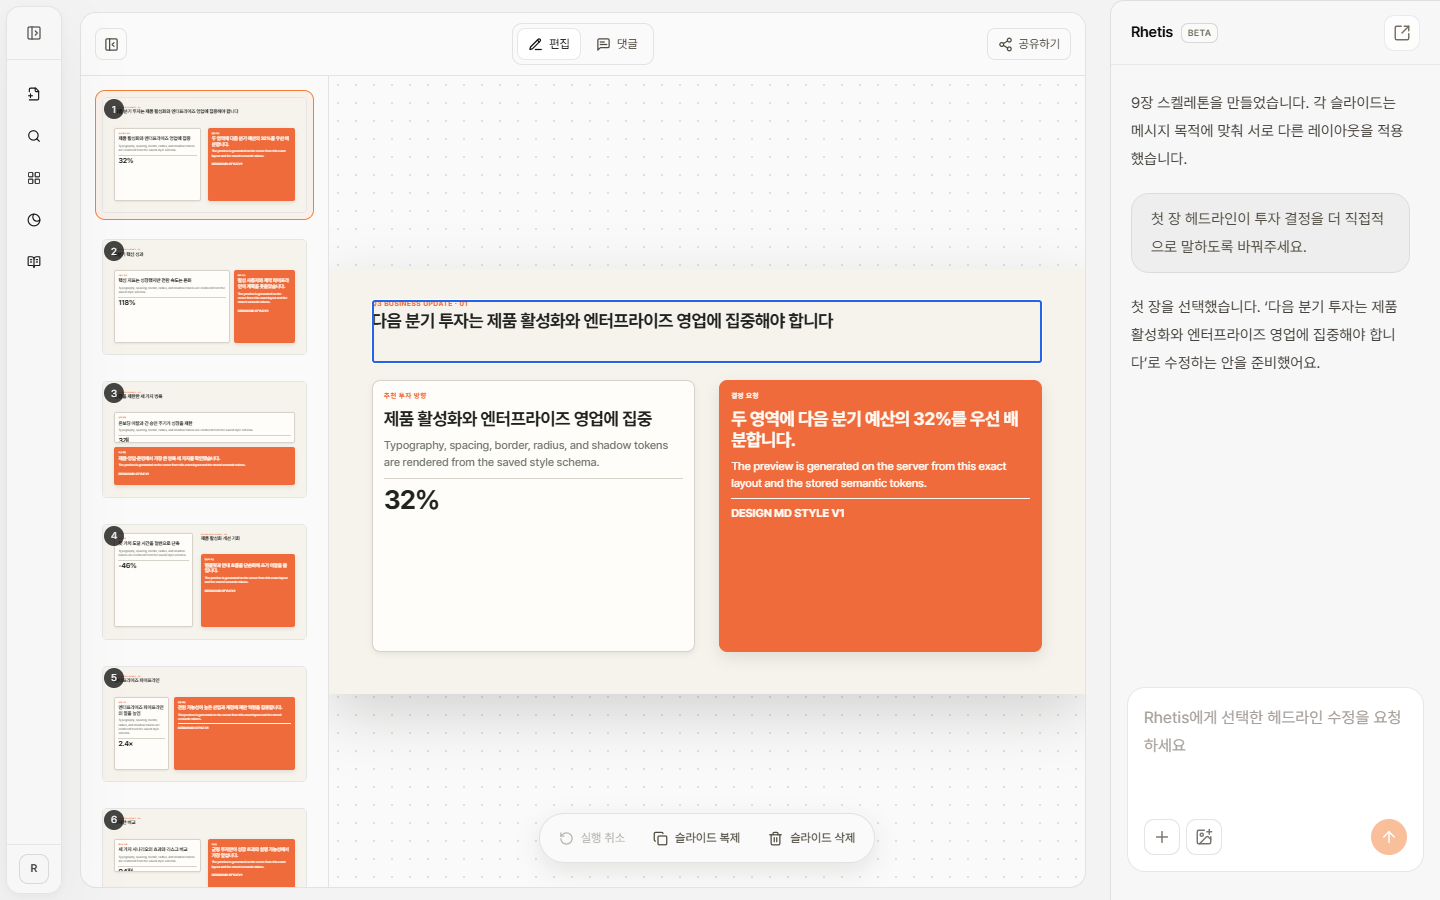
Review the slide list and selected headline, then ask Rhetis to revise the content from the same workspace. - 6
Apply a style and create the final deck
Choose a saved style, or create a new one from a brand book, logo, and reference images. Confirm that the selected style is ready, then start final deck generation.
- 7
Review, share, or export to PDF
In the final deck, check figures, sources, clipped text, and image quality. If your team needs to review it, share it by link or email and assign permissions. Export to PDF when you need a file for submission.
Criteria for checking your first result
- Check whether the conclusion or core problem is visible in the first one or two slides.
- Check whether every slide communicates one clear message.
- Check whether uploaded figures and dates match the source material.
- Check that unsupported claims or illustrative figures are not presented as facts.
- Confirm slide order and message density before applying a final style.
- Before sharing, confirm that the material is appropriate to show externally.
Rhetis helps you create a draft quickly, but you are responsible for verifying the factual accuracy, copyright, and confidentiality of the final presentation. Review customer names, financial figures, market data, and external images directly before submission.